
When it comes to bathroom maintenance and aesthetics, one often-overlooked detail is the Filler Between Bathroom Tiles. This material, typically referred to as grout or tile filler, plays a crucial role in both the functionality and appearance of your bathroom. Whether you’re renovating an old bathroom, dealing with cracked grout, or installing new tiles, understanding the ins and outs of tile Filler Between Bathroom Tiles is essential.
In this comprehensive guide, we’ll explore the types of tile Filler Between Bathroom Tiles, their benefits, application techniques, maintenance tips, and how to choose the right one for your bathroom.
What Is Tile Filler Between Bathroom Tiles and Why Is It Important?
Tile Filler Between Bathroom Tiles, commonly known as grout, is a material used to fill the gaps between tiles. It not only secures the tiles in place but also prevents water, dirt, and debris from seeping underneath, which could cause damage over time. Grout also enhances the visual appeal of tiled surfaces by creating clean lines and a polished finish.
Key Functions of Tile Filler Between Bathroom Tiles
- Seals Gaps: Prevents water and moisture from penetrating beneath the tiles.
- Adds Stability: Helps keep tiles securely in place.
- Enhances Appearance: Complements the tiles’ color and texture.
- Prevents Mold and Mildew: Reduces the likelihood of mold growth in moist environments like bathrooms.
Types of Filler Between Bathroom Tiles
Understanding the different types of grout can help you choose the right option for your bathroom project.
1. Cement-Based Grout
- Features:
- Made of a mix of cement, water, and sand.
- Available in sanded and unsanded varieties.
- Best For:
- Sanded grout: Wider gaps (more than 1/8 inch).
- Unsanded grout: Narrow gaps (less than 1/8 inch).
- Pros: Affordable and easy to apply.
- Cons: Prone to cracking and requires sealing to prevent water damage.
2. Epoxy Grout
- Features:
- Made of epoxy resins and a Filler Between Bathroom Tiles powder.
- Highly durable and water-resistant.
- Best For:
- High-moisture areas like showers and bathtubs.
- Pros: Resistant to stains, chemicals, and mold.
- Cons: More expensive and challenging to apply.
3. Acrylic Grout
- Features:
- Pre-mixed and easy to use.
- Water-resistant and flexible.
- Best For:
- Small-scale projects and areas with slight movement.
- Pros: Quick application and no need for sealing.
- Cons: Limited durability compared to epoxy grout.
4. Silicone Sealant
- Features:
- Flexible and waterproof.
- Often used for caulking edges and corners.
- Best For:
- Areas prone to movement or expansion, such as corners and edges.
- Pros: Excellent water resistance.
- Cons: Not suitable for large gaps or extensive tile areas.
Choosing the Right Tile Filler Between Bathroom Tiles
1. Consider the Gap Width
The width of the gaps between your tiles will dictate whether you need sanded or unsanded grout. For gaps larger than 1/8 inch, sanded grout is ideal as it provides added strength and prevents shrinkage.
2. Evaluate Water Resistance
Bathrooms are high-moisture areas, so choosing a water-resistant grout is crucial. Epoxy grout is often the best choice for showers and bathtubs due to its superior water resistance.
3. Match the Aesthetic
Grout comes in a variety of colors, allowing you to match or contrast with your tiles. Neutral colors like white, gray, or beige are classic choices, while bold colors can create a striking effect.
4. Ease of Application
If you’re planning a DIY project, consider a pre-mixed grout or acrylic grout for easier application. For more complex projects, professional application may be required.
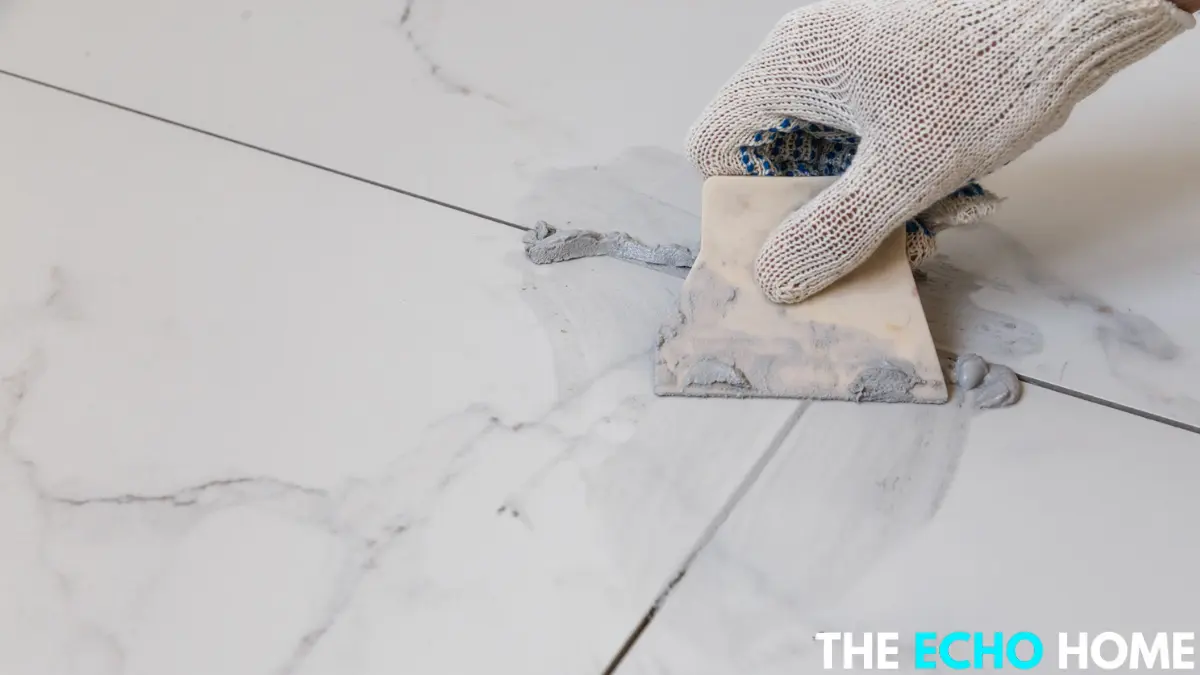
How to Apply Tile Filler
Applying grout correctly ensures durability and a polished finish. Here’s a step-by-step guide:
Materials Needed:
- Grout (pre-mixed or powder form)
- Grout float
- Sponge
- Bucket of water
- Sealant (if required)
Steps to Apply Grout:
- Clean the Tile Surface:
- Ensure the tiles and gaps are clean and free of debris.
- Mix the Grout:
- If using powdered grout, mix it according to the manufacturer’s instructions until it reaches a peanut butter-like consistency.
- Apply the Grout:
- Use a grout float to spread the grout diagonally across the tile surface, pressing it firmly into the gaps.
- Remove Excess Grout:
- Hold the float at a 45-degree angle and scrape off the excess grout from the tile surface.
- Clean the Tiles:
- Wait 10-15 minutes, then use a damp sponge to wipe off grout residue from the tiles.
- Cure the Grout:
- Allow the grout to cure for the recommended time (usually 24-48 hours).
- Seal the Grout:
- Apply a grout sealer if necessary to enhance water resistance and prevent stains.
Common Issues with Tile Filler and How to Fix Them
1. Cracking Grout
- Cause: Improper mixing, movement in the substrate, or lack of sealing.
- Solution: Remove the damaged grout and reapply, ensuring proper application techniques.
2. Discoloration
- Cause: Stains, mold, or mildew.
- Solution: Clean with a grout cleaner or bleach solution. Apply a sealer to prevent future staining.
3. Mold and Mildew Growth
- Cause: High humidity and inadequate ventilation.
- Solution: Regularly clean with an anti-mold cleaner and improve bathroom ventilation.
Maintaining the Tile Filler
Proper maintenance ensures your grout stays in top condition for years to come. Here are some tips:
1. Regular Cleaning
- Use a gentle cleanser or a mixture of water and vinegar to clean grout lines.
- Avoid harsh chemicals that can erode the grout over time.
2. Apply a Sealer
- Seal cement-based grout every 6-12 months to maintain its water resistance and prevent stains.
3. Address Cracks Promptly
- Repair cracks or gaps as soon as you notice them to prevent water damage.
4. Control Humidity
- Use an exhaust fan or dehumidifier to reduce moisture levels in the bathroom.
Professional vs. DIY Application
While DIY application is feasible for smaller projects, hiring a professional may be worth the investment for larger or more complex tasks. Professionals have the expertise to handle intricate tile patterns and ensure a flawless finish.
Conclusion
The Filler Between Bathroom Tiles plays a pivotal role in both the functionality and aesthetics of your space. By choosing the right type of grout, applying it correctly, and maintaining it over time, you can ensure your bathroom stays beautiful and protected from water damage.
Whether you opt for a DIY approach or hire professionals, investing in quality Filler Between Bathroom Tiles will pay off in the long run. With this guide, you’re now equipped with the knowledge to make informed decisions and tackle your next bathroom project with confidence.